For improving your personnel experience with heureka ModGen and to arrange your trial period as simple and successfull as possible, we have prepared a getting-started guide that covers the basic functions and ressources of heureka ModGen.
1. ModGen User Guide and demonstration models
The installation directory of heureka ModGen contains documents and models to ensure you an easy and quick start into the product.
By default, those files can be found in the following location:
C:\Program Files (x86)\erwin\heureka\ModGen
The actual location can sometimes differ, depending on which location you have used for the installation of heureka ModGen.
The „Documents“-folder contains an User Guide in german and english language, decribing the fundamental concepts and options of the product. It also includes a tutorial that guides you through the first steps when generating data vault via heureka ModGen.
The matching models for this tutorial can be found within the folder „tutorials“.
We highly recommend to first take a look at the User Guide before blindly getting started with testing heureka ModGen. Especially the provided tutorial will give you a good impression on the functional principles of the Add-in.
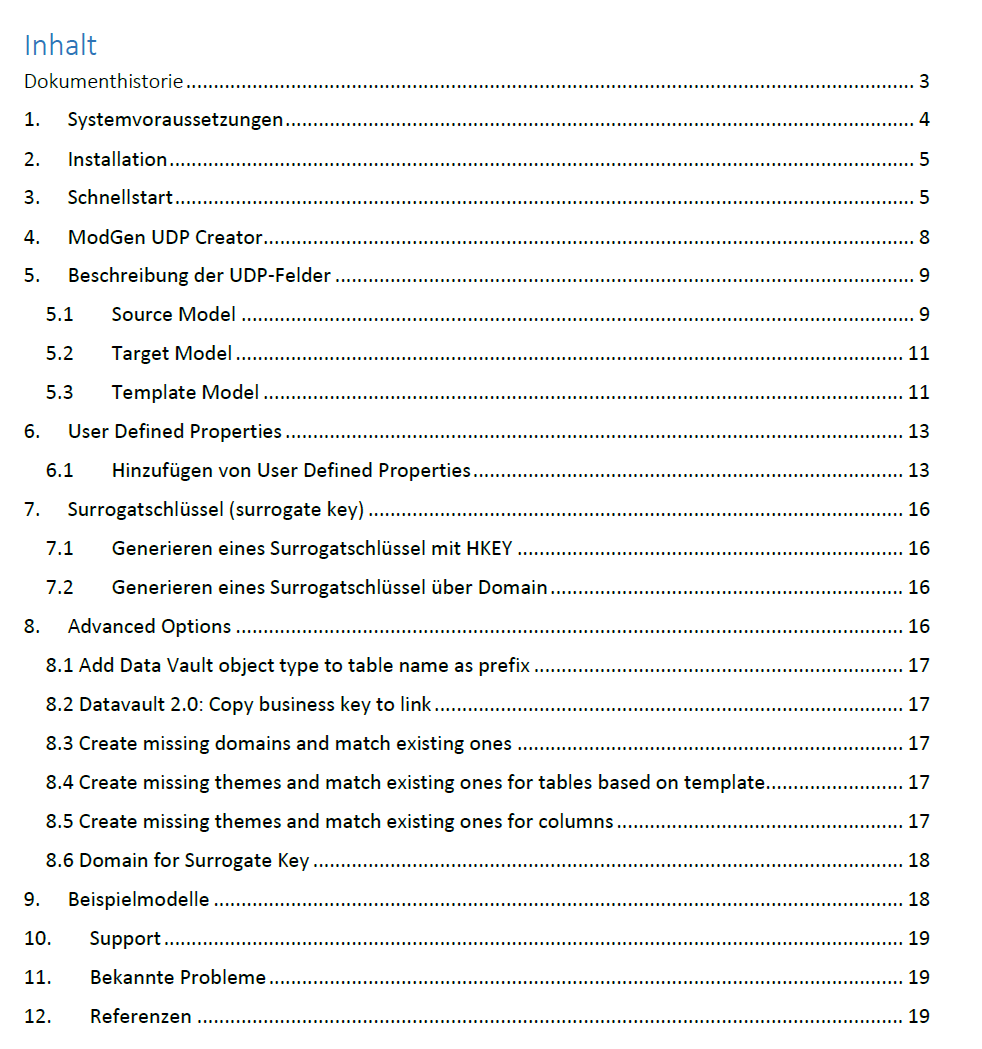 |
| Content of the ModGen User Guide |
2. Preparation of your data model
For governing the analysis of heureka ModGen, it is necessary to provide both, the source model as well as the target model with specific UDP’s (User Defined Properties).
This is not only time consuming but can also be very annoying, especially when it comes to more than a few models that must be prepared for generation.
Therefore ModGen comes with a cost-free Add-In included in your installation. This Add-In prepares your models for the generation process with just a few and easy clicks. You will find it navigating to Tools -> Add-Ins in the erwin toolbar.
A detailed description of all used/created UDPs and their related functions can be found in the User Guide. By the way, I highly recommend using the ModGen UDP Creator. This way a list of all legitimite values is created in the background.
Once the required UDPs have been added to the models, there is one single step left for successfully generating your data vault: the identification of data vault table types inside of your source model.
3. Identification of Data Vault Object types
Once your models have been prepared, you have to assign a data vault type to all columns of your source model (or at least those, that should be considered for the generation process).
For controlling the analysis, ModGen uses the UDP „MODGEN_COLUMN_TYPE“, which has been added to the source model in a previous step.
As a consequence the value „BKEY“ for example identifies a column out of which ModGen will create a Hub with the associated „Business Key“ in your target model. The value „CONT“ however will create a Satellite that will be populated with the descriptive attributes of a Business Key.
A full list of all supported values and objects that are being created out of them can be found in the User Guide.
For quickly populating the UDPs, we recommend using the „Bulk Editor“ which is an official and cost-free feature within the erwin Data Modeler that helps you to mass editing your model objects. This tool can be found in your existing erwin installation via View > Windows Bulk Editor Pane in the erwin toolbar.
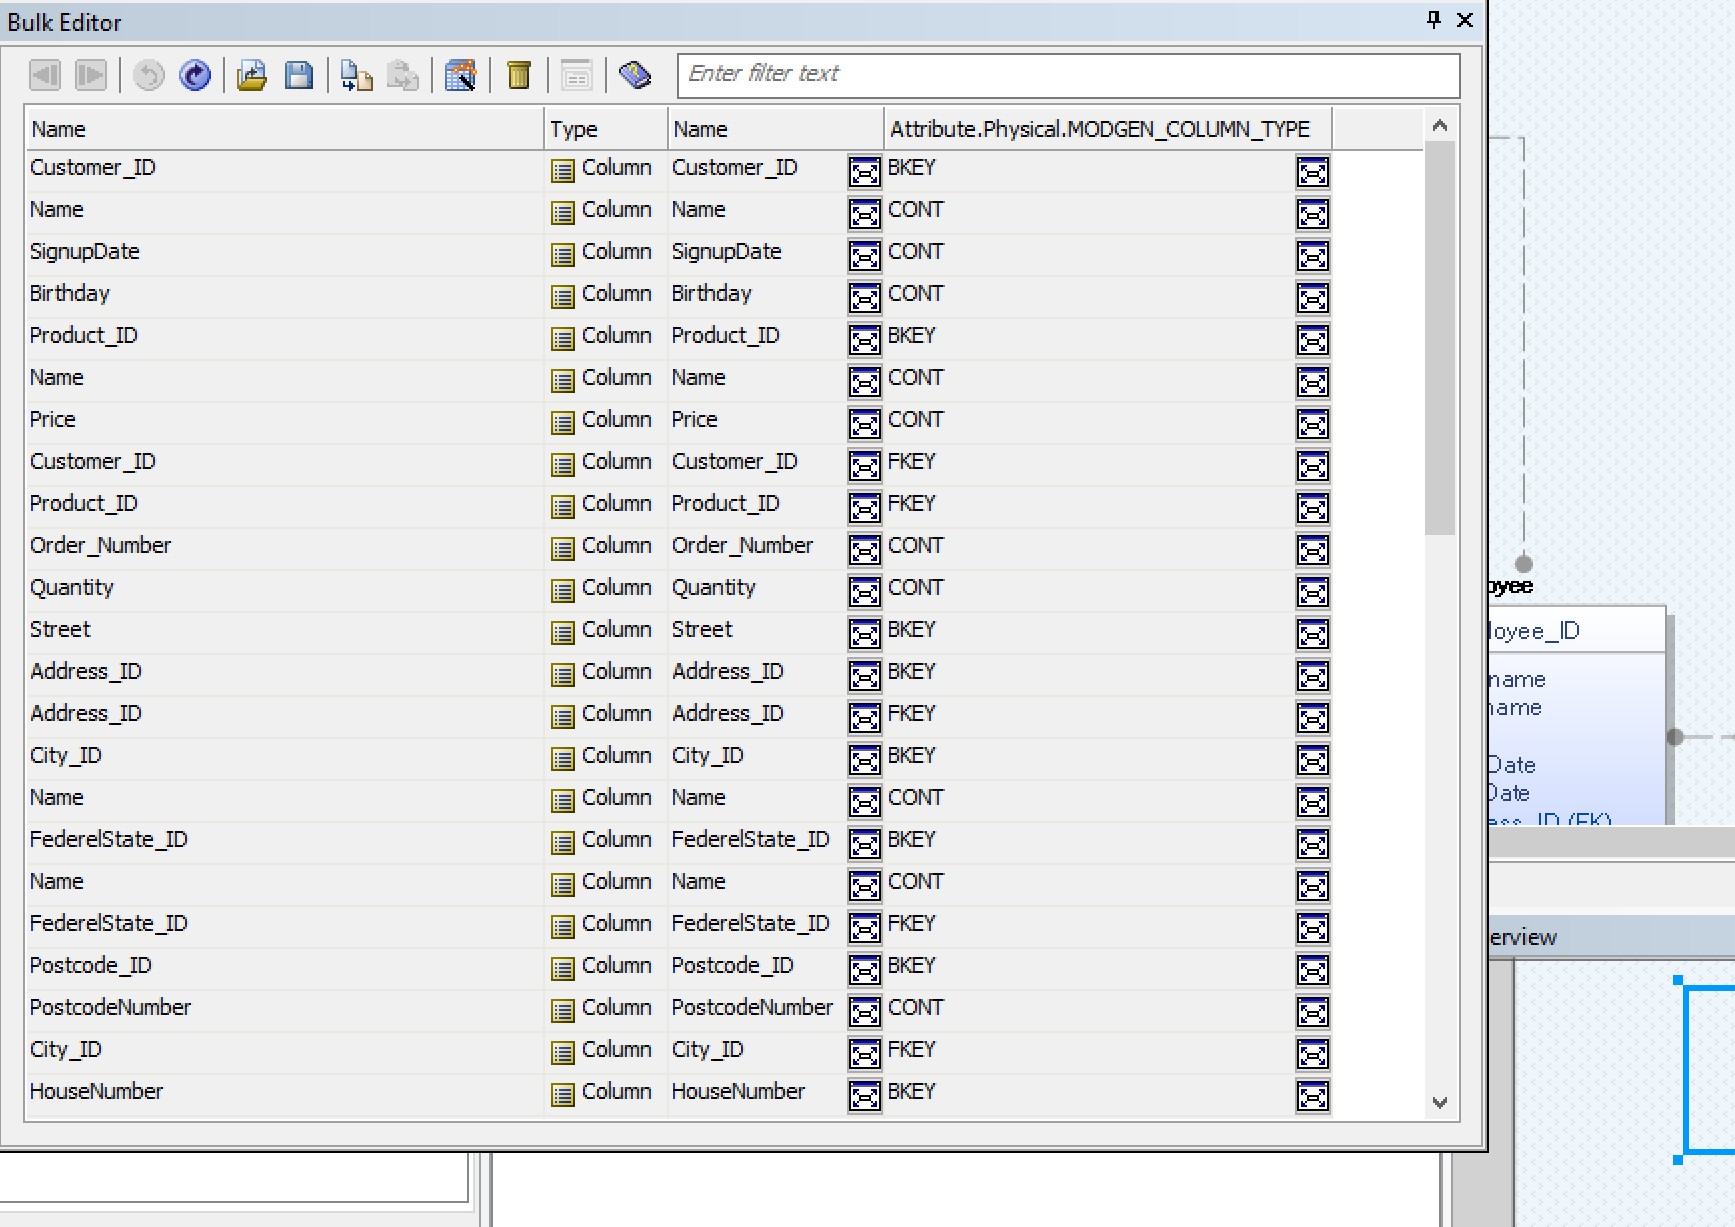 |
| The Bulk Editor in erwin |
As an alternative, the ModGen UDP Creator also allows you to automatically populating the UDP "MODGEN_COLUMN_TYPE". This will analyse your whole model and then populating the values appropriately. We highly recomment to recheck those values, for it will not necessarily be the result you have wished for. But nevertheless, this can be very useful for working out a first basis point.
We hope this little summarization will help you to better understand the product and simplify your testing period with ModGen. Keep up reading our related posts to this series for more information!
If you require further information or help, just contact our support: support@heureka.com. We will be glad to help you out.